Water Damage Repair Part II:
When Things Get Wet In The
Wrong Places
Before starting this water contamination repair project, we acquired all the parts and pieces that we felt were needed. We then removed the trim separating the side panel from the bottom fiberglass floor of a 1994 Fleetwood Tioga.

This water damage repair project was hindered by our inability to gain complete access to the underlying wood structure. As can be seen with the following graphics, we had quite a bit of swelling and degrading of wood. This was the result of an extended amount of water contamination on the sub frame wood resulting from past roof leaks.
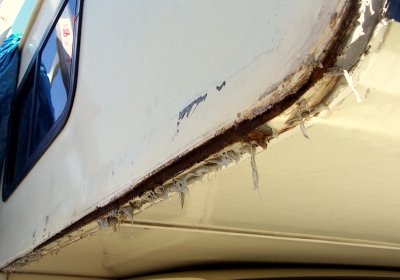
- We wanted to restore the original shape and size to the fiberglass panels so the metal trim piece would fit properly and protect the vulnerable sub frame wood.
- We wanted to restore the sub frame wood to a hardened state so that it would accept the bite of the screws.
- This could have been a project stopper. If we could not get the new stainless screws to hold the old wood together, we would have to replace all of the damaged wood. This would have put this water damage repair project over the top. This is very important, because this leak repair project would no longer be considered a simple fix.
- We wanted to "weather proof" the sub frame wood so it would be unaffected by any further water incursion from potential future roof leaks.
-
We wanted to fill any voids that were created by wood damaged by dry rot.
- We wanted to use the epoxy as a redundant measure that would help to hold everything together.
- We wanted to do this without removing the side and bottom panels on this motorhome.
Break A Leak Repair Project
A key factor in using the G-Flex epoxy was the different characteristic that it exhibited depending on how it was mixed. With straight 1:1 ratio, it would exhibit a "seeping" action before curing.
We spread this mixture of epoxy on the edge (across the grain) of the damaged wood. This gave it the opportunity to seep. With a cure time of around 24 hours, this would give it lots of time to "soak in". Due to the long cure time, we could then mix another batch of epoxy using a filler.
Our goal with this second epoxy mix was for it to act as a filler to replace areas of damaged, or missing wood. We needed for it to achieve the consistency of peanut butter, or maybe mayonnaise. Mixing in this manor allows the epoxy to fill into exposed gaps and stay put. It would not simply run out leaving a void. We hoped that this combination of epoxy mixes would give the new screws a foundation to fasten to.
The following two graphics below show:
- the epoxy being inserted between the sub frame wood and the fiberglass wall.
- the epoxy 24 hours later after being compressed and allowed to cure.
Remember, we had already coated all of the wood that could be reached with the 1:1 ratio epoxy. This second stage of our water damage repair job can be referred to as the "peanut butter" stage.
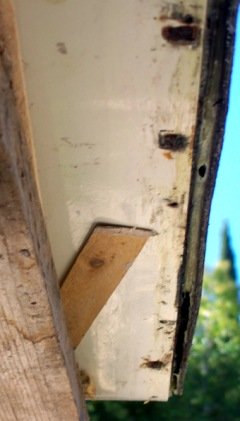
When performing a water damage repair, mixing the epoxy to achieve maximum benefit is almost an art form. I have learned to look at the material I wish to epoxy. This determines the size of voids that need to be filled. The smaller the void, the more viscus the epoxy must be. However, if it is too viscus (too runny) it will migrate out of the void, doing you little good. If it is not viscus enough, it would have a difficult time filling the smaller spaces.
This is almost a "seat of the pants" kind of thing. I have learned the value of running a few trial and error attempts to ascertain the proper mix, this helps me to become much more comfortable with the process.
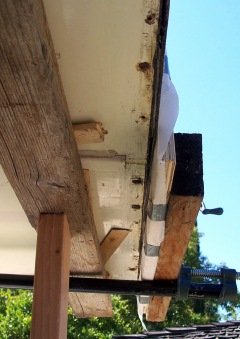
The graphic on the right shows the process 24 hours later. You can see how much straighter the fiberglass
wall is. If you look closely, you will
see some gaps where we did not fill the epoxy completely between the two surfaces. It is a simple matter of mixing some more "peanut butter"
and pushing it up into place.
Okay, there is more to this water damage repair process that I have not covered. The following discussion shows an example of Brian's ingenious way of solving a problem.
Looking at the graphic above, you will see the end of a pipe-clamp on
the right. There is also a straight 2 X 4 being held in a horizontal position by another vertically placed 2 X 4. This is the neat stuff. All the epoxy in the world would not make the RV automatically go back to its original shape. So we persuaded it with specifically applied pressure.
Referring to the graphic below, we used three sets of pipe clamps to force the fiberglass wall panel to fit snug against the top and bottom fiberglass panels. Referring back to the graphic above, it can be seen that we distributed the pressure evenly by inserting a shaped piece of 3/4" plywood.
This shape matches the radius of the curve on the motorhome cab-over section. Again, referring to the picture above, there is a sheet of white waxed paper separating the wood from the fiberglass and being held in place with duct tape. Ya gotta use duck tape somewhere in a leak repair project like this!
Anyway, the purpose of the waxed paper was to keep the 3/4" plywood from becoming epoxied to the motorhome. It would have made a good conversation piece around the campfire... but my wife has limits.

The purpose of the vertical and horizontal 2 X 4's is to push up on the bottom fiberglass panel. We put a scissor jack under the vertical board and simply tightened it up until the bottom settled into the proper position. The goal with all this pushing and shoving was to put everything back in place. As I recall, I was not in a hurry to remove the pressure on these wooden braces. I would not have been a happy camper if all of this did not hold together.
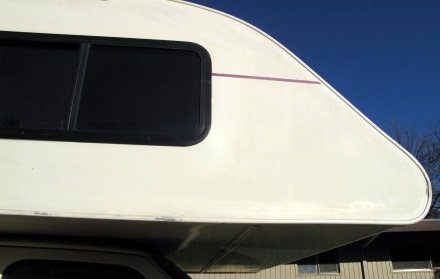
The last graphic below shows the finished product. The damaged fiberglass that was caused by collision has been repaired with epoxy. This water damage repair project was performed in June of 2008. I've had a chance to put some miles on the road, and we have had rain. Everything seems to be holding together just fine. I still have some painting touch up to do. But essentially, it's good to go.
You Would Like To Share?
Well, maybe you also have completed a project that came out well. EVERYONE likes to hear success stories. The feedback that I’ve received on this project indicates that many of my on-line readers were glad to for the information about this repair job.
So, maybe you have a story to tell... it doesn't have to be about water damage repair. If YOU have done something to your rig… whether it is a repair project, or even some type of modification to improve the usability of your rig, other people will be interested.
Besides, if you want to describe and submit your project using the form below, I will give YOU OWN WEB PAGE to display your handiwork on. If you use pictures, that’s OK too! Just tell a story about what is being shown…
Share your Motorhome Ideas, Plans, and Projects with Other Motorhome Enthusiasts!
We would love to hear about your motorhome projects… anything that other motorhome enthusiasts might enjoy or find educational:
* Any projects with unexpected outcomes... stuff that happens when it wasn’t in the plans.
* Unique ideas or accomplishments that were a huge success… or simply something that solved a problem.
* Did something break down on your last trip? You may have some unique advice for a fellow traveler.
* We are all looking for good repair facilities. Have you had good experiences with any repair services?
* Don’t forget the before and after pictures that tell a story!
What Other Visitors Have Said
See what projects other visitors have completed on their Class C Motorhmomes!
1995 Tioga Montara Had a Leak - Ouch! 


In 2008 I bought a used Tioga Montara from who I thought was a decent fella. He had it for about 8 years, and seemed to be on the up and up. When I …
Back To The Future!
From 1979 to 21st Century Not rated yet
We bought a '79 Dodge Honey for $800 on craigslist. It came with orange carpet & old wood paneling along with a bad smell. Oh yeah... and water damage!! …

Return To Top Of Page
Leave Damage Repair: Part II and return To RV Repair: Sooner Or Later, Something Is Going To Need Fixing!
Leave Water Damage Repair: Part II And Go To Leave RV Repair: Tioga Water Damage Repair Project Part I
Leave Damage Repair: Part II And Return To The Class C Motorhome: How To Achieve The Maximum RV Lifestyle! Page
YOUR STORIES
1995 Tioga Montara
Had a Leak - Ouch!
A Simple Way To Put An Electrical Thermostat On A Small Space Heater
In A Truck Camper!
A Great Destinaton, With An Unexpected Outcome!
Test Link
Below: For An Alternative Destination... A Four Mile Hike Around Sugar Pine Reservoir
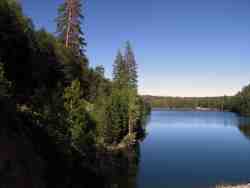
A Good Place To Begin The Joshua M. Hardt Memorial Trail Is At The Dam. This 3.5 Mile Trail Is Good For Foot Traffic And Bicycles... No Motorized stuff
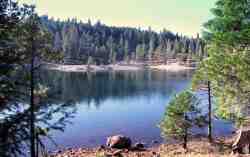
The Manzanita Day Use Area Is A Good Place To Sit And Watch The Wind
Play With The Water!
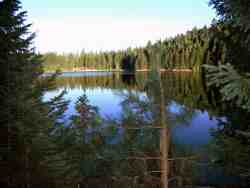
Another View From The Joshua M. Hardt Memorial Trail... Morning and Evening Are The Best Times To Hike This Trail. The Still Reflections Will Capture Your Attention
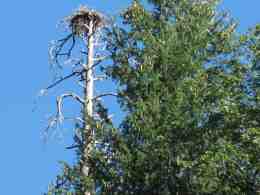
You May Want To Bring A Camera... There Are Large Birds Of Prey High In The Ski


